
How to draft a pattern for a trapeze dress
- Jul 8, 2019
- 5 min read
Hello Darlings!
I am very excited about what I am going to share with you today - my very first pattern drafting tutorial! Pattern drafting is a skill I learned at sewing school and honestly, it was one of the key elements that took my sewing to the next level. Knowing how to make my own patterns not only allows me to create any design I want or recreate a look from a photo, but also I got much better at fitting commercial patterns - once I knew the basics of how the pattern is made, alterations became much more easy and clear. It does take time to learn to draft patterns, but it’s time worth investing if you want to get better at sewing. And I am super excited to have the opportunity to share my experience and knowledge with you!
Before we move along with the tutorial, I would like to thank Clover USA for sponsoring this tutorial and providing a set of Clover Curved Rulers that you will see me using a lot in this video. This set contains a French Curve and a Hip Curve rulers - the essential items in pattern drafting; as well as Mini Ruler, which is very convenient to measure small distances, such as shoulder lines or necklines. I got to test this set while making a few of my designs (including the one you will see in the tutorial) and I can say only positive things about it: I like that these rulers are transparent, which makes it easy to mark lines, add new details or draw seam allowance; plus, these rulers are flexible and durable plastic, meaning this one set will last you a lifetime. Last but not least, a cute detail that this Clover Curve ruler set comes in a clear pouch, so that you can neatly and safely store all your rulers in one place, without ever losing either of them.


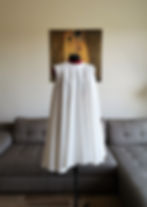
Before we move to the tutorial, here are a few photos of my new dress (couldn't help myself - I love this beauty!).


And now... It's time for the tutorial!
Click below to see the full Youtube tutorial, and if you scroll a big below you will find all instructions in written text. Hope you will like this tutorial as much as I liked making it! Enjoy!
TOOLS
Pattern drafting does not require a lot of tools and here is a list of basic tools that I use for all my pattern drafting:
Craft paper. I use craft paper for drafting because it’s easy to draw on, easy to get in any DIY store, and plus it’s cheap (and you need a lot of paper for drafting);
Pencil;
Measuring tape;
Long ruler;
CLOVER Curve Ruler set, containing: French curve ruler, Hip curve ruler, Short ruler.

FRONT PART
Start by drawing your waistline. From the waistline, go up and measure the length of your front line. Draw a new line at the top. From the edge of the paper, measure ¼ of the bust and draw a line again. This will be your front part net.
Let’s start working on the neckline. From the corner, mark 8 cm down and 7 cm to the left. Connect these dots with a curved line, using a Clover curved ruler.
Next up - shoulder line. Mark a small dot line 3 cm down. From the highest point of the neckline, measure and mark shoulder length, making sure that the end of the line hits the dotted 3 cm line.
Now it’s time to mark bust depth from the top line and bust width from the edge of the paper. Mark a small line 3 cm above the bust depth line - this will be the bottom of your armhole. Draw a curved armhole line, using Clove Curved ruler.
From the top of the neckline, measure the length of the dress you want and draw a hemline. Connect with end of armhole with a straight line.
Because our dress has bands on neckline and armhole - it’s time to mark them. My bands are 3 cm width and it’s very easy to mark it with a clear Clover curved ruler.

The front part is done and now it’s time to move to the back!
BACK PART
Start by drawing your waistline. From the waistline, go up and measure the length of your back line. Connect with a line. From the new line, measure ¼ of the bust and draw a line again. This will be your back part net.
Let’s start working on the neckline. From the corner, mark 7 cm to the right. From the marked dot go up by 3 cm. Connect this dot with a curved line, using a Clover curved ruler.
Next up - shoulder line. From the highest point of the neckline, measure and mark shoulder length, making sure that the end of the line is about 1 cm below the top net line.
Now it’s time to mark back width from the edge of the paper and armhole depth, which will be18 cm below the top net line. Draw a curved armhole line, using Clove Curved ruler.
Measure the length of the dress you want and draw a hemline. Connect with end of armhole with a straight line.
Last step - same as with front part - it’s time to mark bands (same as front, bands are 3 cm width).

Now that you have both front and back parts done, cut them out. Cut away the bands.
BANDS
Take a new paper, take the cutout armhole bands and connect them at the top. Draw around, to make a full piece. When you will be cutting out the fabric, you will need 4 pieces of these bands (2 for the outside, 2 for the inside backing).

Repeat the step with neckline bands, connecting them at the shoulder line and drawing around. Make sure you place the front part neckline edge on the side of the paper, as you will need to cut this detail on fold. You will need to cut 2 pieces of the neckline band.

DRESS PART
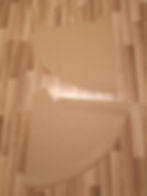
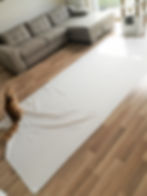
Now the fun part - let’s make that dress circled! Take front part, mark straight lines, 5 cm apart. Cut the lines, leaving 0.5 cm to the edge (important: do not cut completely to the end!). Place the pattern on a big piece of paper (note: best to use paper that is the same width as your fabric - this will be your guide) and spread the pattern, so that front and side lines are at a 90 degree angle (feel free to use tape to stick the pattern to place). Draw around the pattern. To make a nicely curved hemline, use a Hip Curved line.
Repeat the same with the back piece.
Add seam allowance and you are finished!


P.S. This dress is a real fabric "eater", so note that you will need a lot of fabric! (I used 3 meters for mine :))
Hope you enjoyed this tutorial and wishing you a wonderful week ahead!
Best wishes,
Julie