
How to find perfect serger tension
- Aug 23, 2025
- 3 min read
Finding perfect serger thread tension can be tricky - there are 4 threads, and knowing how to set each one of them can be a challenge (it surely was for me!). In this post, I want to share a tip that finally helped me understand serger thread tension - and it might be even easier than you think!

This post is created in partnership with Brother and all samples are sewn using Brother Airflow3000 overlocker. As the name suggests, this serger has air threading system, which makes threading looper threads as simple as a push of a button.

Now let's discuss how to find that perfect serger thread tension:
How to find perfect serger tension
To find perfect serger thread tension, try using what I call the 'Opposites rule'. This rule sounds like this:
High tension -> less thread in the seam
Low tension -> more thread in the seam
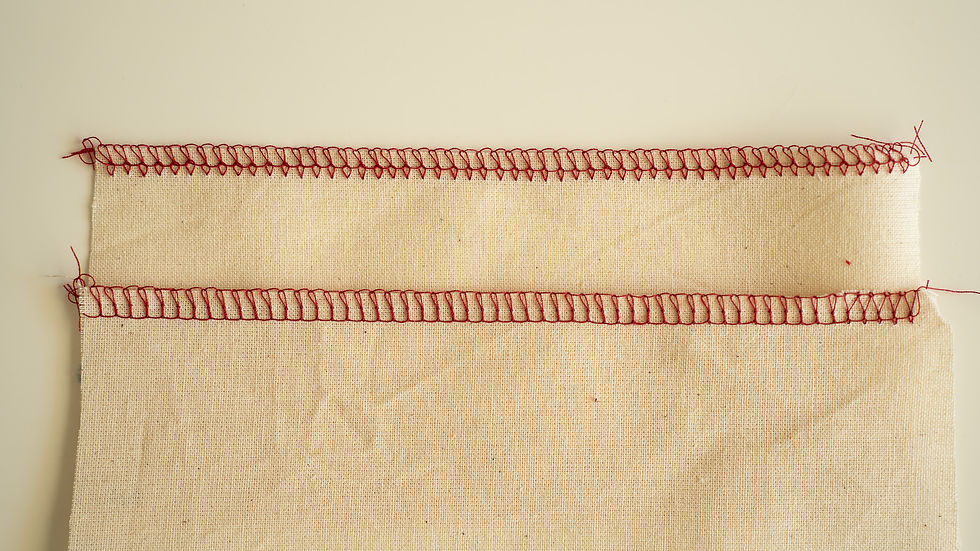
To help understand this Opposites rule, let's do a few visual examples. In this example, let's set tension in first needle thread to lowest setting - tension 0. With tension 0, tension discs are loose and not tensing the thread, so a lot of thread can flow into the seam. Because a lot of thread goes into the seam, the seam does not lay flat on fabric and we can see big loops.

Applying 'Opposites rule': if you're seeing loops and/or seam does not lay flat on fabric, this shows there's too much thread in the seam, tension is too low, and to fix this you need to increase tension.
Now let's do the opposite example and set tension in first needle thread to setting 9 - highest tension setting. With tension setting 9, tension discs are very tight and they are tensing thread a lot, resulting in less thread in the seam. Because less thread goes into the seam, the seam is puckering or looks gathered.
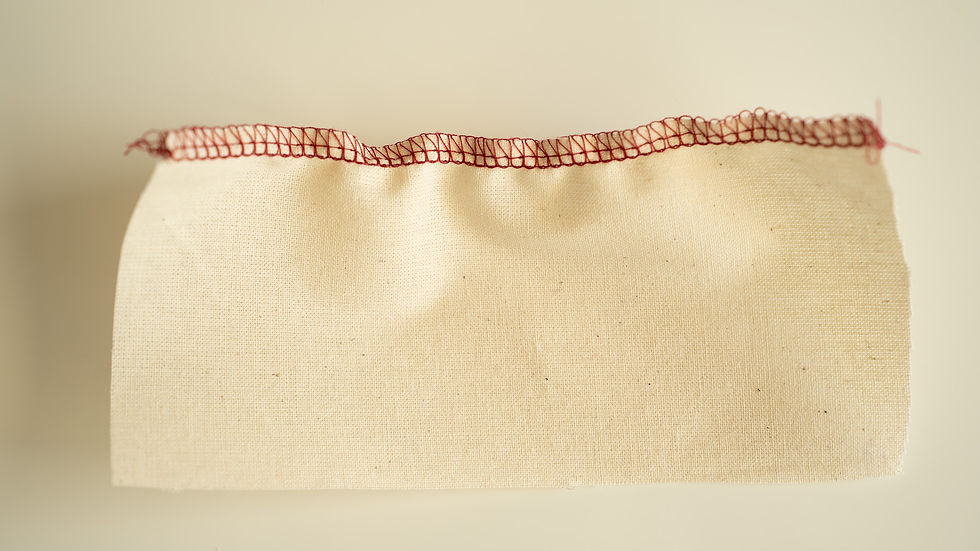

Applying 'Opposites rule': if you're seeing puckering, waviness or gathers, this shows that there's too little thread in the seam, tension is too high, and to fix this you need to lower tension.
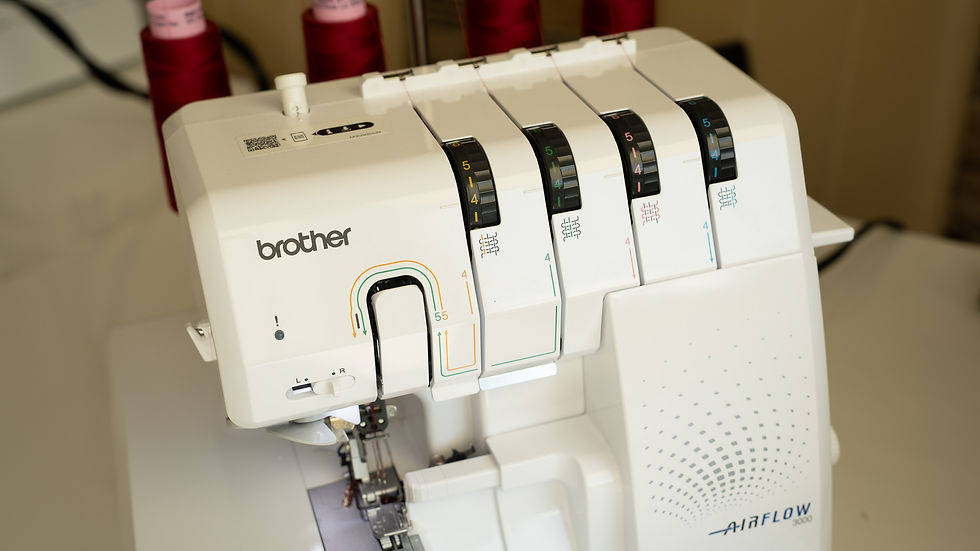
With most fabrics that I sew, I typically sew using thread tension 4 in all threads (this is medium tension setting in Brother Airflow 3000 serger) - this tension setting works great with most medium weight fabrics (both woven and knit).

However, if I'm working with very lightweight or very heavyweight fabrics, I will do adjustments based on 'Opposites rule' to fine-tune seam settings for specific fabric, typically staying within medium tension range, indicated on tension discs:
Try this 'Opposites rule' next time you need to find perfect serger thread tension!
Thank you for reading and wishing you a wonderful day!
Julija Gobere
Let's connect!
JOIN MY EMAIL COMMUNITY: https://www.sewingjulie.com/subscribe
MY SEWING COURSES: https://courses.sewingjulie.com/courses
SEWING PATTERNS: https://www.etsy.com/shop/SewingJuliePatterns
INSTAGRAM: https://www.instagram.com/sewingjulieblog/
TIKTOK: tiktok.com/@sewingjulie


After reading the article on achieving perfect serger tension, I liked how it explained balancing the upper and lower loopers and testing stitches on scrap fabric before adjusting further. The part about uneven loops causing fabric puckering felt especially practical for beginners working with stretch materials. I also found myself thinking about how structured troubleshooting approaches like this are similar to AutoCAD Assignment Help, and AutoCAD Assignment Help workflows, where precision and step-by-step correction matter a lot in results. Even services like New Assignment Help often emphasize clarity and methodical problem solving, which oddly connects back to managing tension issues in sewing machines too.
The escort business operates on elegance, privacy, and professional companionship. It connects clients with experienced escorts who provide both emotional and physical experiences. This industry emphasizes mutual respect, consent, and discretion, creating luxury experiences tailored to personal preferences.
In geometry dash scratch, players can unlock new icons and colors as they progress. The gameplay requires precise timing and quick reflexes.
This post really insightful. The way it explained balancing the threads and adjusting carefully for the best outcome reminded me of how small tweaks can make a big difference. Just like sewing requires precision and patience to achieve a flawless finish, managing academic tasks also demands balance and attention to detail. For students, finding that equilibrium often means seeking the right kind of assistance. That’s where australia assignment help from platforms like myassignmenthelp.expert comes in, helping learners achieve accuracy and success in their studies without losing focus on other priorities.