


How to Sew a Hooded Scarf (Beginner Sewing Pattern & Step-by-Step Tutorial)
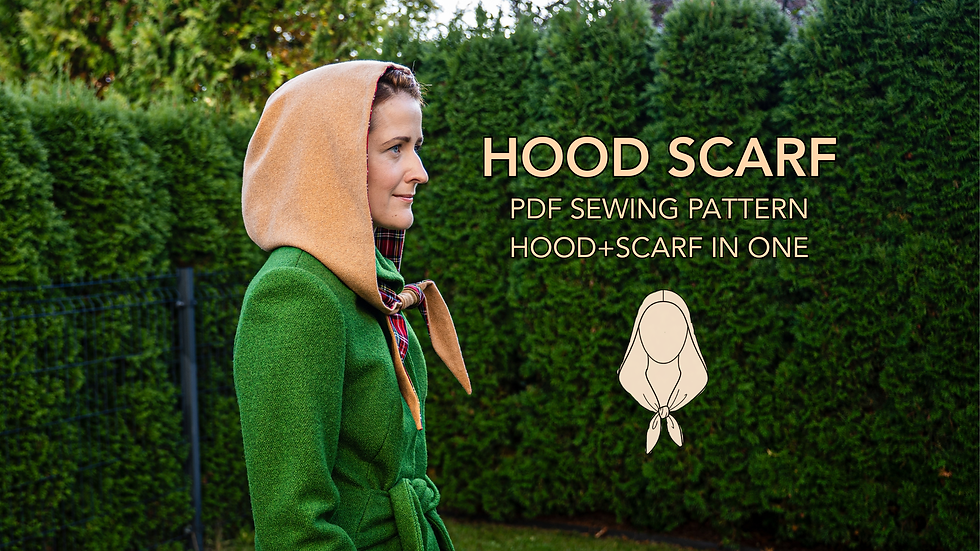
If you've been following fashion trends, you've likely noticed the rise of cozy winter accessories - scarves and hoods are truly gaining the popularity they deserve. And even better? A mix of both: a hooded scarf! A hooded scarf (also known as a "scoodie") is the perfect winter accessory: warm, windproof, and great for adding a pop of color to your outfit. A true winter wardrobe winner!
If you've been eyeing a hooded scarf project for yourself - or looking for a thoughtful, handmade DIY gift for Christmas and the holiday season - I have good news: I created this UGNIS Hooded Scarf Sewing Pattern to be simple, fast, and light on fabric usage. It's extremely beginner-friendly - if you can sew a basic seam, you can make this project! Below, you’ll find the complete guide, process photos, and key tips to stitch up this cozy, must-have winter piece. I've so enjoyed sewing this hooded scarf, and I hope you'll enjoy sewing yours, too!

FABRIC FOR HOODED SCARF
How to choose fabric for a hooded scarf? Very simple, really: the cozier, the better! This hooded scarf is designed for woven fabrics with little to no stretch. For the main fabric, choose medium- to heavyweight wovens such as wool coating, denim, corduroy, or washed linen.
This pattern is fully lined (for maximum coziness!), and for the lining, I recommend using light- to medium-weight wovens such as cotton, linen, silk, or lightweight wool. You can also use your main fabric for the lining if you're working with a light- to medium-weight material.
Tip: The lining is visible when the hooded scarf is worn, so have fun choosing a contrasting color, a bold print, or a luxurious fabric for the inside! I love using plaid flannel for the lining - so cozy and cute!
How much fabric do you need to sew a hooded scarf? This pattern is designed to use as little fabric as possible - you can cut it from less than 1 meter (less than a yard) of fabric! See the table below for exact fabric consumption:

HOOD SCARF SIZING
What sizes are available for this pattern? This hooded scarf sewing pattern is available in One Size. It features a spacious, cozy hood designed to fit most adults, along with long scarf tails that allow you to tie and adjust the fit to your liking.
See the measurement table below for finished hooded scarf dimensions:

HOW TO SEW A HOODED SCARF
How to sew a hooded scarf? Sewing this design couldn't be easier - there are just 3 main seams to sew! This makes the project extremely beginner-friendly and something you can cut and stitch in a single evening.
In my UGNIS Hooded Scarf pattern, I've included all the detailed steps you need to construct a fully lined hooded scarf with a crisp, professional finish. Click below to watch the full YouTube video sew-along, or scroll down to read the step-by-step written instructions!
Step 1: place the main fabric hood pieces right sides together, matching the raw edges. Sew along the top curve using a straight stitch with a 1 cm (3/8") seam allowance.

Step 2: fold seam allowance to one side and topstitch from the right side, about 3 mm (1/8") from the seam, using a 4 mm stitch length. Trim the excess seam allowance on the inside so the curved seam lies better.

Step 3: Repeat Steps 1 and 2 using the hood lining pieces.
Step 4: place the main hood and lining right sides together, matching all raw edges. Sew around the outer edge with a 1 cm (3/8") seam allowance, leaving a 5 cm (2") opening along the neckline for turning.
Tip: at sharp corners, leave the needle down in the fabric, raise the presser foot, and pivot the fabric to continue stitching.

Step 5: clip or trim the seam allowance along the inner curve so the seam lies flat and smooth when turned.

Step 6: trim the seam allowance diagonally across the corners to reduce bulk when turned right side out.

Step 7: turn the hood right side out through the opening and press the edges flat, keeping the seam right on the fold. Slip stitch or ladder stitch the opening closed.
Your hood is complete!

Did you enjoy sewing this design? I’d love to see your creation! Share your finished hood on Instagram or TikTok using #ugnisbygobere and tag me. Enjoy sewing!

👋Hi, I’m Julija Gobere! I’m here to teach you how to sew better and easier. On this blog, I share straightforward, practical tips and tool hacks to help you skip the frustration and get straight to sewing things you love.
👉Let's connect!
MY SEWING COURSES: https://courses.sewingjulie.com/courses
SEWING PATTERNS: https://goberepatterns.etsy.com
INSTAGRAM: https://www.instagram.com/sewingjulieblog


Comments